
Publishing
Cecil Desktop publishes your site to Netlify, Vercel, GitHub Pages or AWS S3 / CloudFront, directly through their APIs: no git, Netlify, Vercel or AWS CLI is required. Only the changed files are sent.
Targets and accounts
A target says where a site is published: a hosting provider, its settings (site, project, repository or bucket) and the account used to connect to it. A site can have several targets, e.g. Production and Staging Pro.
An account holds the token (or the keys) of a hosting provider. It is stored once and shared between your sites: add it with your first target, or in Preferences › Accounts. Tokens are checked with the provider, then encrypted with the system keychain (Windows Credential Manager, macOS Keychain); they are never written in your sites.
Add a target
- Open the Publishing section of the site (
Ctrl/⌘+4) and click New target. - Choose the Hosting provider, and give the target a name (e.g. Production).
- Fill in the settings of the provider: see Netlify, Vercel, GitHub Pages or AWS S3.
- Optionally, set a Base URL of the build, to publish with another URL than the one of the configuration (e.g. for a staging target).
- Choose an existing account, or New account…: name it, paste its token (the Create a token link opens the page of the provider), and click Save.
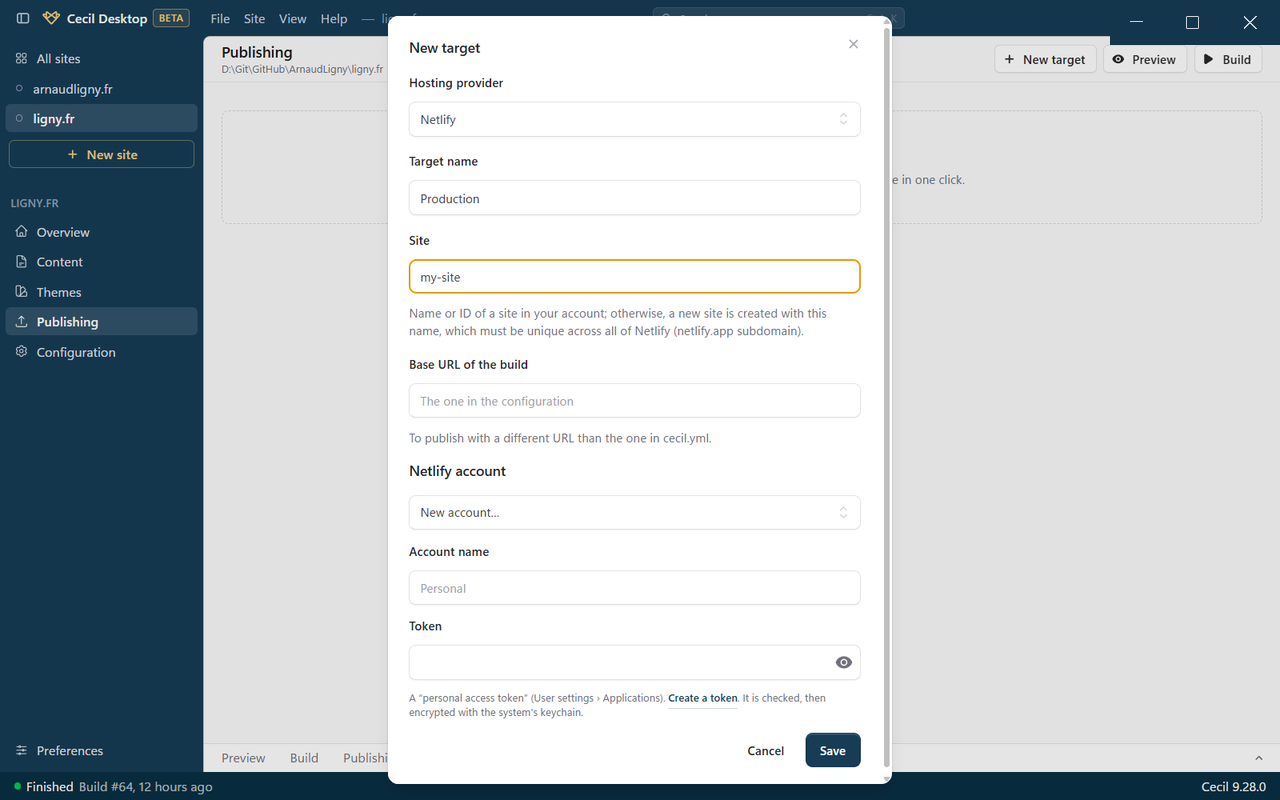
The token and the target are checked with the provider before they are saved: if something is wrong (invalid token, missing permission, unknown repository…), an error is shown and nothing is saved.
Publish
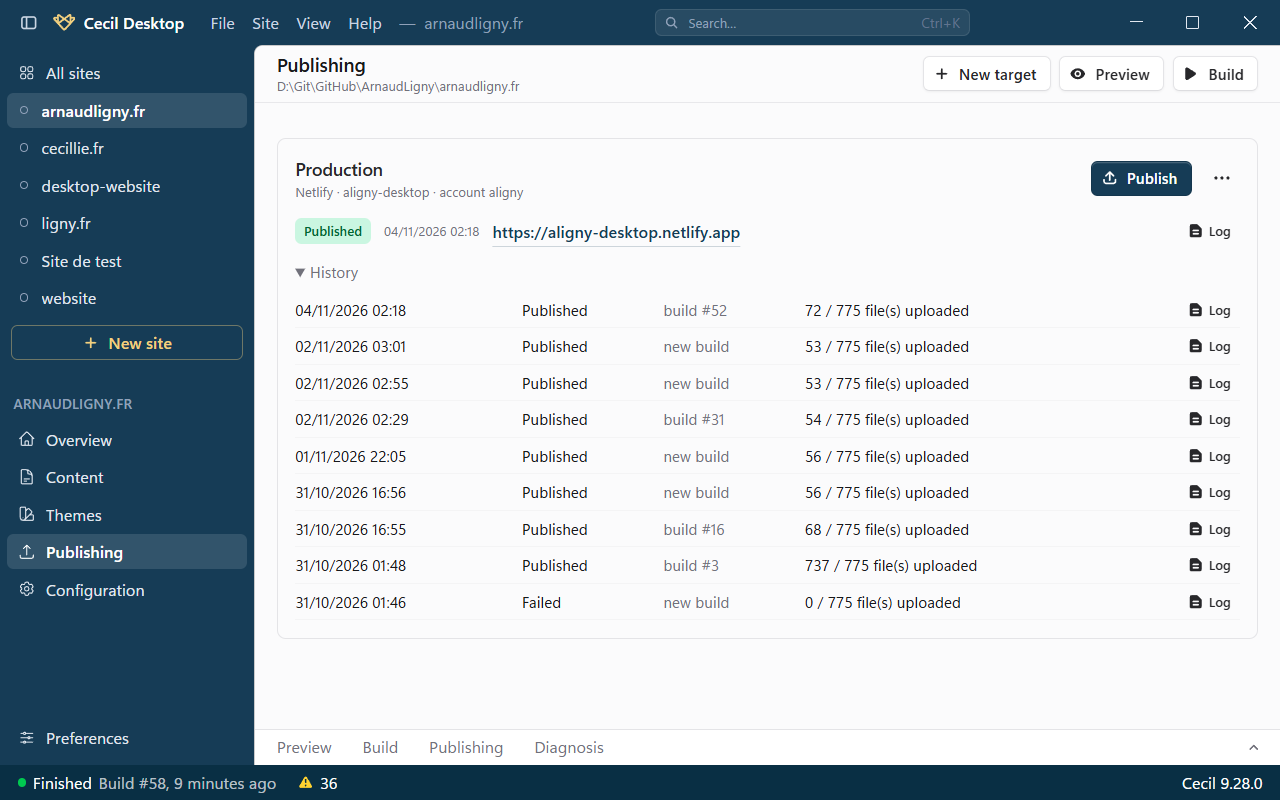
Click Publish on a target, or publish to the default target (the last one published) from the toolbar, the Site › Publish menu or Ctrl/⌘+Shift+P. The menu of the toolbar button lists all the targets of the site.
Before publishing, Cecil Desktop offers to Publish this build, the last build of the site, without building it again, when it can be reused: a successful build, without errors, drafts, dry run or single page, with the base URL of the target. If files of the site have changed since this build, it warns you: choose Build again and publish to include your changes.
Otherwise, the site is built for production (without drafts) into its own folder (.cecil/deploy/), then sent. If the build has errors, the publication is cancelled.
During the upload, the target shows the progress (files sent out of the total) and the log streams in the Publishing tab of the Output panel. Once done, the target shows the published URL: click it to open the site.
History
History, under each target, lists its last 10 publications with their date, status, build and number of files sent; Log shows the log of a publication.
To delete a target, use its … menu, then Delete: its history is deleted, but not the published site.
Accounts
Preferences › Accounts (Ctrl/⌘+,) lists your hosting accounts, with the number of targets using them and their status (Valid, Not checked or Failed).
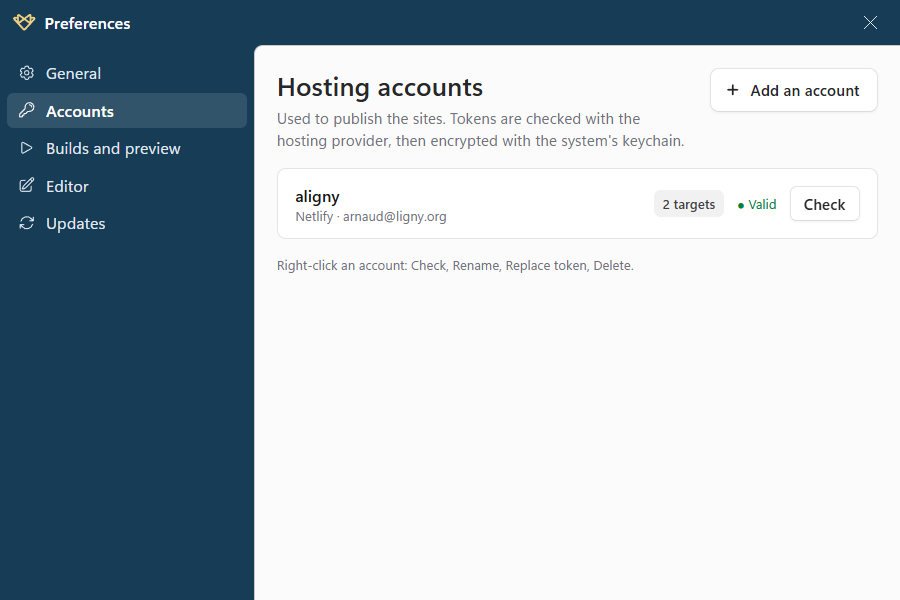
Right-click an account to:
- Check its token again;
- Rename it;
- Replace token, e.g. when it expires;
- Delete it: the targets using it are kept, but must be linked to another account before publishing again.
Troubleshooting
| Message | What to do |
|---|---|
| No account linked to this target. | The account of the target was deleted: edit the target and choose another account. |
| The output of build #… is no longer available | The output folder of the build was deleted: publish again with a new build. |
| The build produced … error(s): publishing cancelled. | Fix the errors of the build (see the Build tab of the Output panel), then publish again. |
| Interrupted (the application was closed). | The app was closed during the publication: publish again. |
| …: error 401 or 403 | The token is invalid, expired or lacks a permission: check the account in Preferences › Accounts, and replace its token if needed. |